Showing posts with label Oracle virtualbox. Show all posts

Friday, October 25, 2013

Oracle developer day VM : How to use Pre-Built Oracle database for learning and testing

Oracle developer day pre-installed virtual machine is very useful to finish your homework, teach yourself about Oracle database, or get ready for that job interview in SQL / PL SQL.
If you want the Oracle database for testing purpose or if you need mobility database just you can export your application database and import into this pre-installed oracle VM, It is very quick and easy to setup. Here i'm explain how i have import our application database into this VM from scratch.

Oracle provide the pre-Build oracle installed VM for testing and learning purpose. This virtual machine contains:
  • Oracle Linux 5
  • Oracle Database 11g Release 2 Enterprise Edition
  • Oracle TimesTen In-Memory Database Cache
  • Oracle XML DB
  • Oracle SQL Developer
  • Oracle SQL Developer Data Modeler
  • Oracle Application Express
  • Oracle JDeveloper
  • Hands-On-Labs (accessed via the Toolbar Menu in Firefox)

  1. Download and install Oracle Virtual Box here
  2. Download Oracle Developer Day pre-installed VM from here
  3. Import downloaded ova file into Virtual Box
Click the "Import Appliance.." to import the downloaded ova file

Select the downloaded ova file

Click the check box as Highlighted

Importing Appliance..


Imported.


I have selected the network setting as "Host only Adapter" because i wanted to use the database only within the hosted PC. So i can connect the database from PC which i installed the virtualbox. If you need to access the database from other network you might need to select "Bridge Connection"


Once you finished the Vertualbox installation you can notice new network adapter to connect virtual machines. This will act as gatway between your PC and all virtual mechines.

Check the virtual adapter's setting  for more understanding about network connections

Start the virtual machine and login as oracle , password also "oracle"

configuration parameters.


4. Oracle TNS tnsnames.ora file has configurations for pre-installed database , below is the terminal output

[oracle@localhost ~]$ cat /home/oracle/app/oracle/product/11.2.0/dbhome_2/network/admin/tnsnames.ora # tnsnames.ora Network Configuration File: /home/oracle/app/oracle/product/11.2.0/dbhome_1/network/admin/tnsnames.ora # Generated by Oracle configuration tools. LISTENER_ORCL = (ADDRESS = (PROTOCOL = TCP)(HOST = 0.0.0.0)(PORT = 1521)) ORCL = (DESCRIPTION = (ADDRESS = (PROTOCOL = TCP)(HOST = 0.0.0.0)(PORT = 1521)) (CONNECT_DATA = (SERVER = DEDICATED) (SERVICE_NAME = orcl) ) ) TTORCL = (DESCRIPTION = (ADDRESS_LIST = (ADDRESS = (PROTOCOL = TCP)(HOST = localhost)(PORT = 1521)) ) (CONNECT_DATA = (SERVICE_NAME = orcl) ) ) [oracle@localhost ~]$
5. Login into oracle database as sysdba then create new user with DBA privileges and normal user to import the database dump.The default password for all accounts is 'oracle'.So you can connect as SYS, HR with 'oracle' as the password. The Linux password are all ‘oracle’ too, so you can login as ‘root’ or as ‘oracle’ in the Linux desktop. Below are the terminal outputs to create the schema / user
[oracle@localhost ~]$ sqlplus 'sys as sysdba' SQL*Plus: Release 11.2.0.2.0 Production on Thu Oct 24 22:44:58 2013 Copyright (c) 1982, 2010, Oracle.  All rights reserved. Enter password: Connected to: Oracle Database 11g Enterprise Edition Release 11.2.0.2.0 - Production With the Partitioning, OLAP, Data Mining and Real Application Testing options SQL> CREATE USER oracle_dba IDENTIFIED BY password$1; User created. SQL> GRANT CONNECT TO oracle_dba; Grant succeeded. SQL> GRANT DBA TO oracle_dba; Grant succeeded. SQL>; CREATE USER SNSDIA IDENTIFIED BY password$1; User created. SQL> GRANT CONNECT TO SNSDIA; Grant succeeded. SQL>ALTER USER SNSDIA QUOTA 100M ON USERS; User altered.
6. Import the data dump into newly created schema / user

[oracle@localhost ~]$ imp oracle_dba@TTORCL file=/home/oracle/Desktop/exp_xxxxx.dmp LOG=xxxxx_import.log FROMUSER=abc TOUSER=acb ignore=Y;
7. Connect to newly created schema from host PC using sql developer


Thursday, September 19, 2013

Setup postgreSQL Virtualbox and connect from windows

TurnKey (http://www.turnkeylinux.org/) providing easy way to get a PostgreSQL instance up and running on your server or VM (VMware, VirtualBox, Xen, KVM) of choice in just a couple of minutes. It is designed to provide users with a pre-integrated, turn-key operating system environment that is carefully built from the ground up with the minimum components needed to run PostgreSQL with maximum usability, efficiency, and security.

Feature highlights
  • SSL support out of the box
  • PHPPgAdmin administration front-end for PostgreSQL
  • auto-updated daily with the latest security patches
  • easy to use configuration console and web management interface
  • minimal footprint - includes only minimum components needed
  • packaged as installable Live CD that runs on real machines and most types of virtual machines (e.g., VMWare, VirtualBox)
  • based on Ubuntu 8.04.2 Hardy LTS
  • PostGIS support
1. Download “Open Virtualization Format(OVF)” from TURNKEY site 

Unzip the downloaded file

2. Import the turnkey ovf file from Oracle VM VirtualBox. If you don’t have Oracle VM VirtualBox then you can download from Oracle site 

Select File menu and select "Import Apliance.."


Select downloaded turnkey ovf (Open Visualization Format) file

3. I got following error when I try to import , it might be the issue because of virtual box configuration or virtual box unsupported ( My version 4.2.0 r80737)

Error when importing 


Failed to import appliance E:\Software\postgresql\turnkey-postgresql-12.1-squeeze-amd64\turnkey-postgresql-12.1-squeeze-amd64.ovf.
Error reading "E:\Software\postgresql\turnkey-postgresql-12.1-squeeze-amd64\turnkey-postgresql-12.1-squeeze-amd64.ovf": unknown element "Config" under Item element, line 47.

Result Code: 	VBOX_E_FILE_ERROR (0x80BB0004)
Component: 	Appliance
Interface: 	IAppliance {3059cf9e-25c7-4f0b-9fa5-3c42e441670b}

I opened the “turnkey-postgresql-12.1-squeeze-amd64.ovf” and lines 47 indicate as follows.


 Line 47 at turnkey-postgresql-12.1-squeeze-amd64.ovf file


So I have removed that segment, it is related to USB Controller (EHCI). When I try to import again it threw following error.


Failed to import appliance E:\Software\postgresql\turnkey-postgresql-12.1-squeeze-amd64\turnkey-postgresql-12.1-squeeze-amd64.ovf.
The SHA1 digest of 'turnkey-postgresql-12.1-squeeze-amd64.ovf' does not match the one in 'turnkey-postgresql-12.1-squeeze-amd64.mf' (VERR_MANIFEST_DIGEST_MISMATCH).
Result Code: 	VBOX_E_FILE_ERROR (0x80BB0004)
Component: 	Appliance
Interface: 	IAppliance {3059cf9e-25c7-4f0b-9fa5-3c42e441670b}

It is because , "manifest" (.mf) file has the SHA1 checksums and since we remove segment from “turnkey-postgresql-12.1-squeeze-amd64.ovf” it is not matched. So I have simply removed “turnkey-postgresql-12.1-squeeze-amd64.mf” file from ovf folder and tried again , it worked fine.

Select the "Reinitialize the MAC address of all network cards" if you have more than one instance in VBox


4. Run the imported instance from Oracle VBox, It direct to postgre installation and configuration wizard.

Provide root password for TurnKey Linux

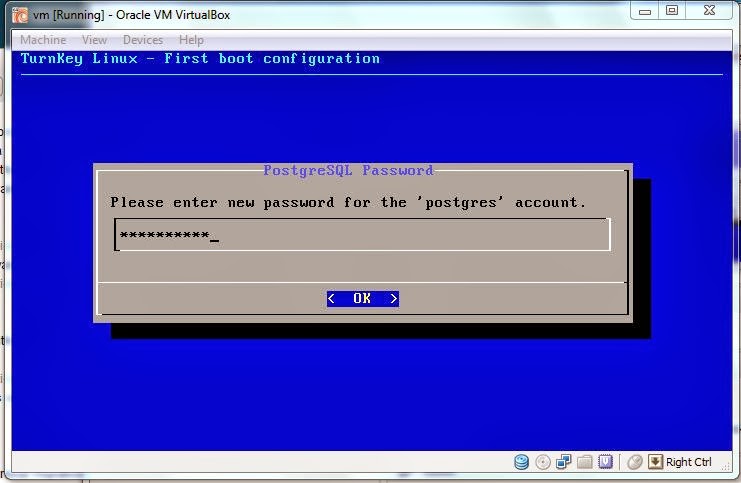
Provide DBA password for Postgres DB server


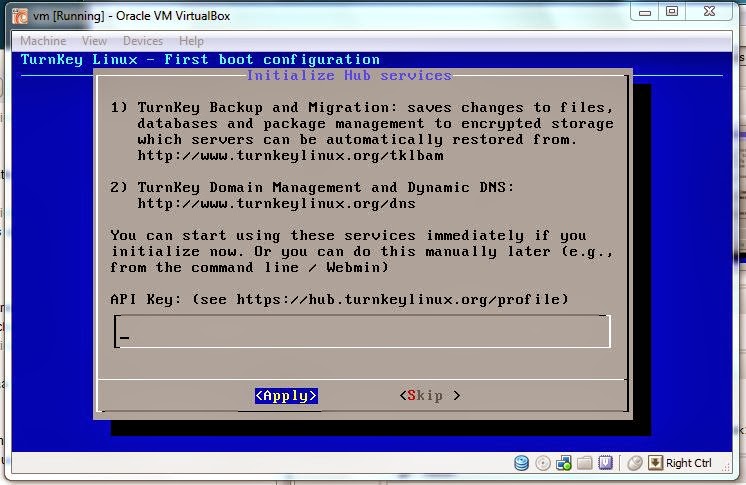
You can Skip this step , Press "Tab" to jump from to


Press Enter to


Default Network Configurations , you can change in if require


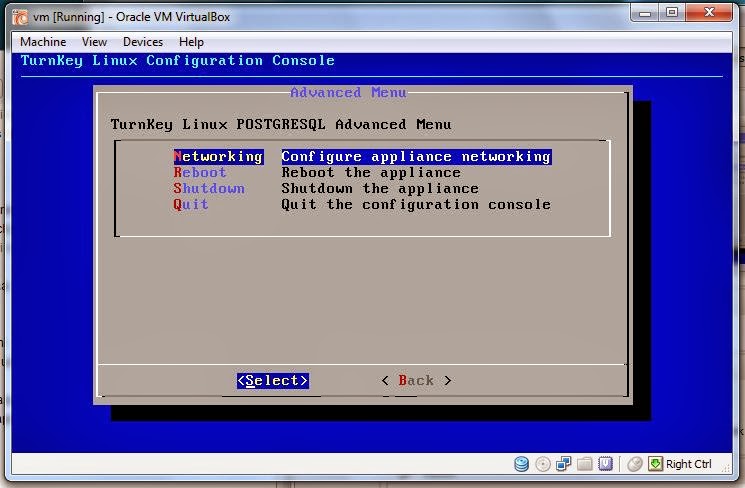
Advance Menu


Default admin postgres username is “postgres” , password which you provided in above step

5. I have changed the network configarion to “Host-Only” in VBox because for my case I only need to access the database from my Windows. 

If you select "Host-Only" then connect can be make from your Host PC only

6. Setup the database connection from Windows host PC.6. Setup the database connection from Windows host PC.

Connection testing from Host PC

pgAdmin tool is GUI based tool you can download from here http://www.pgadmin.org/ to connect to VBox postgres DB.

Connection properties in pgAdmin tool to connect VBox postgres DB

Connection properties in pgAdmin tool to connect VBox postgres DB

7. Done !


Thursday, April 25, 2013

Install Ubuntu in VirtualBox

1.Download and install oracle virtual box 
https://www.virtualbox.org/wiki/Downloads

2. Download ubuntu iso from ubuntu website 
http://www.ubuntu.com/download/desktop

3. Open Oracle virtual box and click "New"

4. Select the memory size 

5. Select the " Create a virtual hard drive now" option


6. Select Hard drive file type


7. Select "Dynamically allocated" option for storage 

8. Select the virtual disk size


9. Double click the newly created "ubuntu" label in left side


10. Select the folder icon as show below


11. Select the downloaded Ubuntu iso file


 12. Click start button as below 


 13. Install the Ubuntu