Sunday, January 12, 2014

Redirection inside @PostConstruct vs preRenderView event

I tried to implement the logic which is needed to redirect when page loading. I have used EJB (3.0) and JSF (2.1)  technologies here.
Initially I used @PostConstruct method with @ViewScoped in ManagedBean.


import javax.annotation.PostConstruct; import javax.ejb.EJB; import javax.faces.bean.ManagedBean; import javax.faces.bean.ViewScoped; import javax.faces.context.ExternalContext; import javax.faces.context.FacesContext; @ManagedBean(name = "redirectTest") @ViewScoped public class RedirectTest implements Serializable { @PostConstruct public void init() { if (isRedirect) { ExternalContext context = FacesContext.getCurrentInstance() .getExternalContext(); try { context.redirect(context.getRequestContextPath() FacesContext.getCurrentInstance().responseComplete(); } catch (IOException e) { e.printStackTrace(); } } }
It throws following exception

com.sun.faces.mgbean.ManagedBeanCreationException: An error occurred performing resource injection on managed bean redirectTest at com.sun.faces.mgbean.BeanBuilder.invokePostConstruct(BeanBuilder.java:229) .... Caused By: com.sun.faces.spi.InjectionProviderException: com.oracle.pitchfork.interfaces.LifecycleCallbackException: Failure to invoke public void redirectTest.init() on bean class class redirectTest with args: null at com.bea.faces.WeblogicInjectionProvider.invokePostConstruct(WeblogicInjectionProvider.java:40) at com.sun.faces.mgbean.BeanBuilder.invokePostConstruct(BeanBuilder.java:223) ... Caused By: com.oracle.pitchfork.interfaces.LifecycleCallbackException: Failure to invoke public void redirectTest.init() on bean class class redirectTest with args: null at com.oracle.pitchfork.inject.Jsr250Metadata.invokeLifecycleMethod(Jsr250Metadata.java:395) ... Caused By: java.lang.reflect.InvocationTargetException at sun.reflect.NativeMethodAccessorImpl.invoke0(Native Method) .. Caused By: java.lang.IllegalStateException: Response already committed at weblogic.servlet.internal.ServletResponseImpl.objectIfCommitted(ServletResponseImpl.java:1651) ...
 
Above exception has given message as “Response already committed”.  Response is already committed means ,it has been sent first few bytes as response from server to client. This is a point of no return. This happen when the backing bean is referenced (and thus constructed) for the first time relatively late in the view, maybe about halfway or in the end. For example


 (1) Bytes already sent to response 
 (2) Point when managedbean created ( if @ViewScoped )

It can not be solved even close the response manually using

FacesContext.getCurrentInstance().responseComplete();

Use the preRenderView method execute during the beginning of the render response phase, right before the HTML is been rendered. The @PostConstruct is intented to perform actions directly after bean's construction and the setting of all injected dependencies and managed properties such as @EJB, @Inject, @ManagedProperty, etc. The injected dependencies are namely not available inside the bean's constructor. This will thus run only once per view, session or application when the bean is view, session or application scoped. The preRenderView event is invoked on every HTTP request (yes, this also includes ajax requests!).

Solution : preRenderView
By using preRenderView will give the solution for this scenario.

Refer this post about best place for the f:metadata element : post

There is the issue , preRenderView might calling more than one time when using with . This can be avoid using
public void init(){ if (!FacesContext.getCurrentInstance().isPostback(){ //put initView codes here }
JSF 2.2 onward "f:viewAction" tag, which is supposed to replace this "f:event type="preRenderView", it will however be possible with the onPostback attribute:

"f:viewAction action="#{defaultNewQuestionHandler.init}" onPostback="false" "


Wednesday, November 27, 2013

Show custom workspace title for each workspace in eclipse


        Most of the developers may works on more than one eclipse at same time, one might be with new version of project and another with older version to compare. Or some of us may working with more than one module or project at the time in different workspace or different eclipse. When we want to switch the working eclipse window/eclipse from one to another we might get confuse and it may kills our time to find correct one. Some time when you copy the code from one window to another you may copy wrong and it will end up with critical issue.

To avoid this confusion we may do following settings in eclipse regards of workspace.
  1. Show the workspace location in title-bar
  2. Add custom title for each workspace, this is very useful because given title displays starts of title and easy when switch by alt+tabbing

Show the workspace location in title bar

This can be achieve by two ways.

1) Add “-showlocation"  (without the quotes) in the shortcut used to launch Eclipse


2) Add "-showlocation"  (without the quotes) eclipse.ini file located inside the eclipse folder


After you follow above step , title-bar will be like below.


Add custom title for each workspace

To get custom title you can specify a name under Window > Preferences > General > Workspace


After add the custom title , title-bar and alt+tablling will be like below


Monday, October 28, 2013

Install Oracle Instant Client in Ubuntu / Linux Mint

1. Download and install RPMs
To download related RPM select your linux version here then download following RPMs

  • oracle-instantclient*-basic-*.rpm
  • oracle-instantclient*-sqlplus-*.rpm
  • oracle-instantclient*-devel-*.rpm
2. Install alien RPM converter if you don't have

sudo apt-get install alien

3. Install RPM by converting via alen converter 

sudo alien -i oracle-instantclient*-basic-*.rpm sudo alien -i oracle-instantclient*-devel-*.rpm   sudo alien -i oracle-instantclient*-sqlplus-*.rpm
below is the terminal output 
praitheeesh@Prai-Linux ~/Downloads $ sudo alien -i oracle-instantclient12.1-basic-12.1.0.1.0-1.x86_64.rpm  dpkg --no-force-overwrite -i oracle-instantclient12.1-basic_12.1.0.1.0-2_amd64.deb Selecting previously unselected package oracle-instantclient12.1-basic. (Reading database ... 157491 files and directories currently installed.) Unpacking oracle-instantclient12.1-basic (from oracle-instantclient12.1-basic_12.1.0.1.0-2_amd64.deb) ... Setting up oracle-instantclient12.1-basic (12.1.0.1.0-2) ... Processing triggers for libc-bin ... ldconfig deferred processing now taking place praitheeesh@Prai-Linux ~/Downloads $ sudo alien -i oracle-instantclient12.1-devel-12.1.0.1.0-1.x86_64.rpm  dpkg --no-force-overwrite -i oracle-instantclient12.1-devel_12.1.0.1.0-2_amd64.deb Selecting previously unselected package oracle-instantclient12.1-devel (Reading database ... 157512 files and directories currently installed.) Unpacking oracle-instantclient12.1-devel (from oracle-instantclient12.1-devel_12.1.0.1.0-2_amd64.deb) ... Setting up oracle-instantclient12.1-devel (12.1.0.1.0-2) ... praitheeesh@Prai-Linux ~/Downloads $ sudo alien -i oracle-instantclient12.1-sqlplus-12.1.0.1.0-1.x86_64.rpm  dpkg --no-force-overwrite -i oracle-instantclient12.1-sqlplus_12.1.0.1.0-2_amd64.deb Selecting previously unselected package oracle-instantclient12.1-sqlplus. (Reading database ... 157563 files and directories currently installed.) Unpacking oracle-instantclient12.1-sqlplus (from oracle-instantclient12.1-sqlplus_12.1.0.1.0-2_amd64.deb) ... Setting up oracle-instantclient12.1-sqlplus (12.1.0.1.0-2) ...
4. Setup environment veritable

To find the installation path of sqlplus type

sudo find / -name sqlplus
praitheeesh@Prai-Linux ~ $ sudo find / -name sqlplus /usr/lib/oracle/12.1/client64/bin/sqlplus
Integrate Oracle Libraries

If oracle applications, such as sqlplus, are complaining about missing libraries, you can add the Oracle libraries to the LD_LIBRARY_PATH each time it is used, or to add it to the system library list create a new file as follows:

sudo vi /etc/ld.so.conf.d/oracle.conf
Then run ldconfig:

sudo ldconfig
   
   
why idconfig ?
ldconfig: Ldconfig is a basic system program which determines run-time linkbindings between ld.so and shared libraries. Ldconfig scans a running system and sets up the symbolic links that are used to load shared libraries properly. It also creates a cache (/etc/ld.so.cache) which speeds the loading of programs which use shared libraries.

ORACLE_HOME

set oracle path and HOME inside /etc/environment (system level , you may set in Session-wide environment level also. You need to logout and login if you set in system level more details here)

praitheeesh@Prai-Linux ~/Downloads $ cat /etc/environment  PATH="/usr/local/sbin:/usr/local/bin:/usr/sbin:/usr/bin:/sbin:/bin:/usr/games:/usr/local/games:/usr/lib/oracle/12.1/client64/bin/ ORACLE_HOME="/usr/lib/oracle/12.1/client64"
Type below command and make sure all the environment variables are set correctly


praitheeesh@Prai-Linux ~/Downloads $ cat /etc/ld.so.conf.d/*.conf
/usr/lib/i386-linux-gnu/mesa
# Multiarch support
/lib/i386-linux-gnu
/usr/lib/i386-linux-gnu
/lib/i686-linux-gnu
/usr/lib/i686-linux-gnu
# libc default configuration
/usr/local/lib

/usr/lib/oracle/12.1/client64/lib
# Multiarch support
/lib/x86_64-linux-gnu
/usr/lib/x86_64-linux-gnu
/usr/lib/x86_64-linux-gnu/mesa-egl
/usr/lib/x86_64-linux-gnu/mesa


praitheeesh@Prai-Linux ~/Downloads $ echo $ORACLE_HOME
/usr/lib/oracle/12.1/client64
praitheeesh@Prai-Linux ~/Downloads $


SDK fix
Some packages may look for 'oci.h' in $ORACLE_HOME/include, or in $ORACLE_HOME/rdbms/public
The instant client sometimes places the include files, such as oci.h, in /usr/include/oracle /client.
Inspect your system by running the following commands

praitheeesh@Prai-Linux /etc/profile.d $ ls $ORACLE_HOME bin  lib
If there is no 'include' directory under ORACLE_HOME, and it is located over in /usr/include/oracle/ , create a symbolic link to assist packages looking for these header files.

sudo ln -s /usr/include/oracle/12.1/client64 $ORACLE_HOME/include
praitheeesh@Prai-Linux /usr/include/oracle/12.1/client64 $ ls $ORACLE_HOME bin  include  lib
libaio1 missing

If sqlplus complains of a missing libaio.so.1 file , you will get following error

praitheeesh@Prai-Linux ~ $ sqlplus sqlplus: error while loading shared libraries: libaio.so.1: cannot open shared object file: No such file or directory
run following command to install libaio1

sudo apt-get install libaio1
5. Done, type sqlplus and connect to database

Friday, October 25, 2013

Oracle developer day VM : How to use Pre-Built Oracle database for learning and testing

Oracle developer day pre-installed virtual machine is very useful to finish your homework, teach yourself about Oracle database, or get ready for that job interview in SQL / PL SQL.
If you want the Oracle database for testing purpose or if you need mobility database just you can export your application database and import into this pre-installed oracle VM, It is very quick and easy to setup. Here i'm explain how i have import our application database into this VM from scratch.

Oracle provide the pre-Build oracle installed VM for testing and learning purpose. This virtual machine contains:
  • Oracle Linux 5
  • Oracle Database 11g Release 2 Enterprise Edition
  • Oracle TimesTen In-Memory Database Cache
  • Oracle XML DB
  • Oracle SQL Developer
  • Oracle SQL Developer Data Modeler
  • Oracle Application Express
  • Oracle JDeveloper
  • Hands-On-Labs (accessed via the Toolbar Menu in Firefox)

  1. Download and install Oracle Virtual Box here
  2. Download Oracle Developer Day pre-installed VM from here
  3. Import downloaded ova file into Virtual Box
Click the "Import Appliance.." to import the downloaded ova file

Select the downloaded ova file

Click the check box as Highlighted

Importing Appliance..


Imported.


I have selected the network setting as "Host only Adapter" because i wanted to use the database only within the hosted PC. So i can connect the database from PC which i installed the virtualbox. If you need to access the database from other network you might need to select "Bridge Connection"


Once you finished the Vertualbox installation you can notice new network adapter to connect virtual machines. This will act as gatway between your PC and all virtual mechines.

Check the virtual adapter's setting  for more understanding about network connections

Start the virtual machine and login as oracle , password also "oracle"

configuration parameters.


4. Oracle TNS tnsnames.ora file has configurations for pre-installed database , below is the terminal output

[oracle@localhost ~]$ cat /home/oracle/app/oracle/product/11.2.0/dbhome_2/network/admin/tnsnames.ora # tnsnames.ora Network Configuration File: /home/oracle/app/oracle/product/11.2.0/dbhome_1/network/admin/tnsnames.ora # Generated by Oracle configuration tools. LISTENER_ORCL = (ADDRESS = (PROTOCOL = TCP)(HOST = 0.0.0.0)(PORT = 1521)) ORCL = (DESCRIPTION = (ADDRESS = (PROTOCOL = TCP)(HOST = 0.0.0.0)(PORT = 1521)) (CONNECT_DATA = (SERVER = DEDICATED) (SERVICE_NAME = orcl) ) ) TTORCL = (DESCRIPTION = (ADDRESS_LIST = (ADDRESS = (PROTOCOL = TCP)(HOST = localhost)(PORT = 1521)) ) (CONNECT_DATA = (SERVICE_NAME = orcl) ) ) [oracle@localhost ~]$
5. Login into oracle database as sysdba then create new user with DBA privileges and normal user to import the database dump.The default password for all accounts is 'oracle'.So you can connect as SYS, HR with 'oracle' as the password. The Linux password are all ‘oracle’ too, so you can login as ‘root’ or as ‘oracle’ in the Linux desktop. Below are the terminal outputs to create the schema / user
[oracle@localhost ~]$ sqlplus 'sys as sysdba' SQL*Plus: Release 11.2.0.2.0 Production on Thu Oct 24 22:44:58 2013 Copyright (c) 1982, 2010, Oracle.  All rights reserved. Enter password: Connected to: Oracle Database 11g Enterprise Edition Release 11.2.0.2.0 - Production With the Partitioning, OLAP, Data Mining and Real Application Testing options SQL> CREATE USER oracle_dba IDENTIFIED BY password$1; User created. SQL> GRANT CONNECT TO oracle_dba; Grant succeeded. SQL> GRANT DBA TO oracle_dba; Grant succeeded. SQL>; CREATE USER SNSDIA IDENTIFIED BY password$1; User created. SQL> GRANT CONNECT TO SNSDIA; Grant succeeded. SQL>ALTER USER SNSDIA QUOTA 100M ON USERS; User altered.
6. Import the data dump into newly created schema / user

[oracle@localhost ~]$ imp oracle_dba@TTORCL file=/home/oracle/Desktop/exp_xxxxx.dmp LOG=xxxxx_import.log FROMUSER=abc TOUSER=acb ignore=Y;
7. Connect to newly created schema from host PC using sql developer


Monday, October 21, 2013

Autosys/Cron job to download ftp files with expect

Expect is a program that "talks" to other interactive programs according to a script. Expect reads cmdfile for a list of commands to execute.
following commands are available under expect package.

  • spawn - starts a process
  • send  - sends to a process
  • expect - waits for output from a process
  • interact - lets you interact with a process


Example auto download scrit using expect which connects with other ftp server and download the define files.


#!/usr/local/bin/expect spawn /usr/local/bin/sftp user_name@ftp.server.com expect "Password:" send "password\r" expect "sftp>" send "cd /documents/downloadfiles\r" expect "sftp>" send "mget O_UEN*.XML \r " expect "sftp>" send "mget O_UL*.XML \r " expect "sftp>" send "mget O_UF*.XML \r " expect "sftp>" send "mget O_AUDIT.XML \r " expect "sftp>" send "bye\r"


The first line is the command interpreter.Then its Wait for the input and send the output. If we don't know the output of the next line , means if we don't know
the expect line then we can use "autoexpect" package instead of "expect" package.

Thursday, September 19, 2013

Setup postgreSQL Virtualbox and connect from windows

TurnKey (http://www.turnkeylinux.org/) providing easy way to get a PostgreSQL instance up and running on your server or VM (VMware, VirtualBox, Xen, KVM) of choice in just a couple of minutes. It is designed to provide users with a pre-integrated, turn-key operating system environment that is carefully built from the ground up with the minimum components needed to run PostgreSQL with maximum usability, efficiency, and security.

Feature highlights
  • SSL support out of the box
  • PHPPgAdmin administration front-end for PostgreSQL
  • auto-updated daily with the latest security patches
  • easy to use configuration console and web management interface
  • minimal footprint - includes only minimum components needed
  • packaged as installable Live CD that runs on real machines and most types of virtual machines (e.g., VMWare, VirtualBox)
  • based on Ubuntu 8.04.2 Hardy LTS
  • PostGIS support
1. Download “Open Virtualization Format(OVF)” from TURNKEY site 

Unzip the downloaded file

2. Import the turnkey ovf file from Oracle VM VirtualBox. If you don’t have Oracle VM VirtualBox then you can download from Oracle site 

Select File menu and select "Import Apliance.."


Select downloaded turnkey ovf (Open Visualization Format) file

3. I got following error when I try to import , it might be the issue because of virtual box configuration or virtual box unsupported ( My version 4.2.0 r80737)

Error when importing 


Failed to import appliance E:\Software\postgresql\turnkey-postgresql-12.1-squeeze-amd64\turnkey-postgresql-12.1-squeeze-amd64.ovf.
Error reading "E:\Software\postgresql\turnkey-postgresql-12.1-squeeze-amd64\turnkey-postgresql-12.1-squeeze-amd64.ovf": unknown element "Config" under Item element, line 47.

Result Code: 	VBOX_E_FILE_ERROR (0x80BB0004)
Component: 	Appliance
Interface: 	IAppliance {3059cf9e-25c7-4f0b-9fa5-3c42e441670b}

I opened the “turnkey-postgresql-12.1-squeeze-amd64.ovf” and lines 47 indicate as follows.


 Line 47 at turnkey-postgresql-12.1-squeeze-amd64.ovf file


So I have removed that segment, it is related to USB Controller (EHCI). When I try to import again it threw following error.


Failed to import appliance E:\Software\postgresql\turnkey-postgresql-12.1-squeeze-amd64\turnkey-postgresql-12.1-squeeze-amd64.ovf.
The SHA1 digest of 'turnkey-postgresql-12.1-squeeze-amd64.ovf' does not match the one in 'turnkey-postgresql-12.1-squeeze-amd64.mf' (VERR_MANIFEST_DIGEST_MISMATCH).
Result Code: 	VBOX_E_FILE_ERROR (0x80BB0004)
Component: 	Appliance
Interface: 	IAppliance {3059cf9e-25c7-4f0b-9fa5-3c42e441670b}

It is because , "manifest" (.mf) file has the SHA1 checksums and since we remove segment from “turnkey-postgresql-12.1-squeeze-amd64.ovf” it is not matched. So I have simply removed “turnkey-postgresql-12.1-squeeze-amd64.mf” file from ovf folder and tried again , it worked fine.

Select the "Reinitialize the MAC address of all network cards" if you have more than one instance in VBox


4. Run the imported instance from Oracle VBox, It direct to postgre installation and configuration wizard.

Provide root password for TurnKey Linux

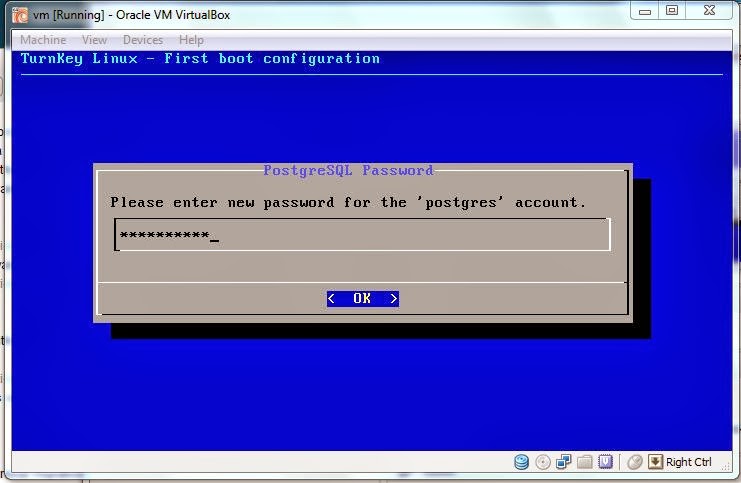
Provide DBA password for Postgres DB server


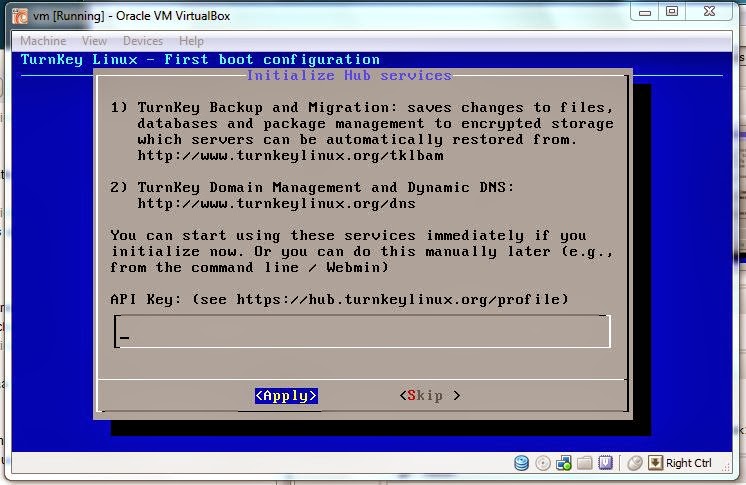
You can Skip this step , Press "Tab" to jump from to


Press Enter to


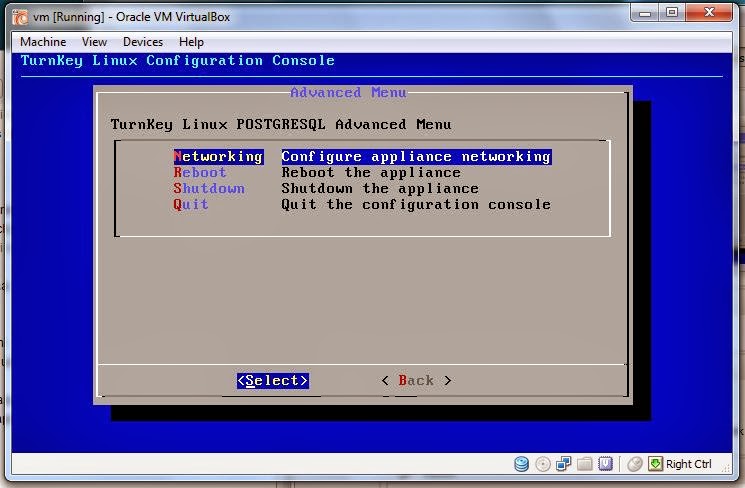
Default Network Configurations , you can change in if require


Advance Menu


Default admin postgres username is “postgres” , password which you provided in above step

5. I have changed the network configarion to “Host-Only” in VBox because for my case I only need to access the database from my Windows. 

If you select "Host-Only" then connect can be make from your Host PC only

6. Setup the database connection from Windows host PC.6. Setup the database connection from Windows host PC.

Connection testing from Host PC

pgAdmin tool is GUI based tool you can download from here http://www.pgadmin.org/ to connect to VBox postgres DB.

Connection properties in pgAdmin tool to connect VBox postgres DB

Connection properties in pgAdmin tool to connect VBox postgres DB

7. Done !


Tuesday, September 10, 2013

How to change the appearance of Eclipse in Linux

Default fonts size of Eclipse editor , Tab , Menu and other text comes with large. To changes the appearance

1. To change the tab spaces and hight

 ECLIPSE_HOME/plugins/org.eclipse.platform_4.2.0.v201206081400/css/e4_default_gtk.css

.MPartStack {         font-size: 9;         font-family: "Droid Sans";         swt-simple: false;         swt-mru-visible: false; }


2. To change Editor text size and style

Eclipse -> Preference


3. To change Windows , Menu and other negotiations

Somewhere on your home directory, create a gtkrc file (like: ~/.gtkrc-eclipse) with following content:

style "eclipse" {         font_name="Sans Condensed 8"         GtkButton::default_border={0,0,0,0}         GtkButton::default_outside_border={0,0,0,0}         GtkButtonBox::child_min_width=0         GtkButtonBox::child_min_heigth=0         GtkButtonBox::child_internal_pad_x=0         GtkButtonBox::child_internal_pad_y=0         GtkMenuItem::horizontal-padding=0         GtkToolbar::internal-padding=0         GtkToolbar::space-size=0         GtkOptionMenu::indicator_size=0         GtkOptionMenu::indicator_spacing=0         GtkPaned::handle_size=0         GtkRange::trough_border=0         GtkRange::stepper_spacing=0         GtkScale::value_spacing=0         GtkScrolledWindow::scrollbar_spacing=0         GtkExpander::expander-size=0         GtkExpander::expander_spacing=0         GtkTreeView::vertical-separator=0         GtkTreeView::horizontal-separator=0         GtkTreeView::expander-size=0         GtkTreeView::fixed-height-mode=TRUE         GtkWidget::focus_padding=0 } class "GtkWidget" style "eclipse"
Finally, to launch eclipse, use following command line:
GTK2_RC_FILES=/usr/share/themes/Clearlooks/gtk-2.0/gtkrc:/home/user/.gtkrc-eclipse '/opt/eclipse-3.3/eclipse'


or, for a desktop icon:
env GTK2_RC_FILES=/usr/share/themes/Clearlooks/gtk-2.0/gtkrc:/home/user/.gtkrc-eclipse '/opt/eclipse-3.3/eclipse'
Ref : http://techtavern.wordpress.com/2008/09/24/smaller-font-sizes-for-eclipse-on-linux/
http://hwellmann.blogspot.sg/2012/06/fixing-editor-tab-fonts-in-eclipse-juno.html